















Naval Warfare Guide - How to Use Naval Vehicles
Ready to turn the tides of war?Naval Warfare has been a critical component to the Battlefield franchise. Beyond capturing the massive scale of war, it’s also one of the elements of the rock, paper, scissors dynamic that help fuel the series’ most incredible moments. In Season 4 for Battlefield 6, naval vehicles will return to Multiplayer across two new maps: Tsuru Reef, a brand-new map to be available at launch, and Wake Island, a franchise icon returning later in the season. Ahead of Naval Warfare’s grand re-entry, here’s how you can leave the competition in your wake, starting with an overview of these new features:HOW TO USE NAVAL VEHICLES IN BATTLEFIELD 6Navigating a ship involves using the exact same controls as a land vehicle, such as a tank. For example, the left stick on a controller - or WASD keys on a keyboard and mouse - acts as the control for the watercraft’s throttle, reverse, and turns.Experienced sailors know it’s easier to keep a naval vehicle moving rather than constantly stalling and stopping it in the water. While the new wave tech can create some natural cover alongside land masses, an idle boat can be a sitting duck for rival watercraft, aerial vehicles, and Engineers on the shores. That new dynamic wave system also creates two distinct sailing experiences: open water and inland waterways. On the high seas around Wake Island and Tsuru Reef, roiling waves will make navigation much more difficult. Expect agitated waters to push your watercraft, which can throw off on-board weapon aiming or even create airtime, as well as create temporary cover for potential ambushes and occasionally block enemy fire.Inland waterways, meanwhile, are calmer and more predictable. Although it is easier to pilot a boat through rivers and around lakes, these bodies of water also put your squad in dangerous territory near land. This is especially because beaching a vehicle - or putting it on land - renders it useless. Unless you prefer to turn your boat into a turret, it’s wise to keep your craft towards the center of narrow waterways and away from beachfaces.Outside of these navigational basics, you should know both naval vehicles - the RCB-90 Patrol Boat and 7.7M NSW RHIB - have their own distinct strengths and weaknesses.RCB-90 PATROL BOATTo our Battlefield 4 veterans, welcome back aboard the RCB-90.This two-seater patrol boat is a bulkier, fully-loaded vessel built for wresting control of the Battlefield by sea. In exchange for having reduced mobility, especially when making turns, the RCB-90 boasts a larger health pool compared to the 7.7M NSW RHIB and includes multiple on-board weapon systems. It also serves as a deploy point: when near the shore or a dock, the boat will open the front ramp automatically. This allows anyone on the team to spawn at the ramp as infantry, great for beachhead landings or making landfall for objectives near ports.Captains of this ship have access to an autocannon - or a rotary heavy machine gun (HMG) - and missiles. The ballistic cannon primary weapon choice is better suited for close-range sea battles or peppering targets on the shore, while the HMG is more effective against infantry and aircraft. The secondary missiles are critical engagement starters that are particularly effective against fellow navalcraft. Get into the habit of firing missiles first, then following up with the autocannon or hMG when in an ideal close range, so that the Patrol Boat saves its ammo and remains off the radar until it’s tactically positioned for success.As for the gunner, the primary objective is to launch the Patrol Boat’s 120mm mortal shells, adjusting aim frequently according to - or against - the driver’s navigation. There are two different modes for firing mortars: manual aiming, which is similar to a tank turret, is great for close range threats, while stabilized indirect fire allows for targeting points on the map even without a direct line of sight. Advanced players can also change the mortar’s muzzle velocity to adjust range and time of flight to the target. Mortar shells come in a variety of flavors; for a quick breakdown, here’s a quick list of what mortars can be equipped and how to best use them:HIGH EXPLOSIVE: High-damage explosive that explodes on impact, similar to the Support Gadget Portable Mortar shell. Meant for direct, accurate fire.AIRBURST: Explodes in proximity to enemy vehicles or hitting surfaces. Deals less damage over a wider radius compared to High Explosive.GUIDED: Lock-on mortars against land and sea vehicles. Perfect for ensuring targeted attacks, albeit with the chance to miss if defensive measures (such as IR Smoke) are deployed.SMOKE: Creates a large smoke cloud upon impact. Excellent strategic tool for concealing movements, including for allies advancing on the shorelines.ILLUMINATION: Parachutes down at the apex and pings enemies - both infantry and vehicles - on the minimap during its descent. Aim high and near areas where enemies may be hiding or moving t
Ready to turn the tides of war?
Naval Warfare has been a critical component to the Battlefield franchise. Beyond capturing the massive scale of war, it’s also one of the elements of the rock, paper, scissors dynamic that help fuel the series’ most incredible moments.
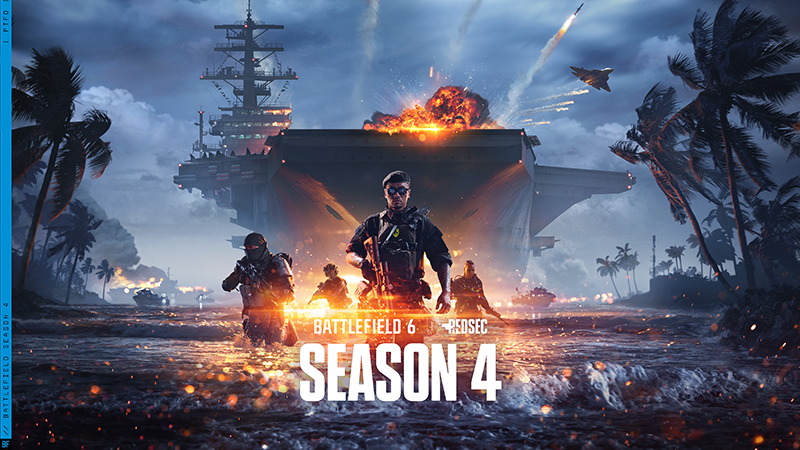
In Season 4 for Battlefield 6, naval vehicles will return to Multiplayer across two new maps: Tsuru Reef, a brand-new map to be available at launch, and Wake Island, a franchise icon returning later in the season. Ahead of Naval Warfare’s grand re-entry, here’s how you can leave the competition in your wake, starting with an overview of these new features:


Navigating a ship involves using the exact same controls as a land vehicle, such as a tank. For example, the left stick on a controller - or WASD keys on a keyboard and mouse - acts as the control for the watercraft’s throttle, reverse, and turns.
Experienced sailors know it’s easier to keep a naval vehicle moving rather than constantly stalling and stopping it in the water. While the new wave tech can create some natural cover alongside land masses, an idle boat can be a sitting duck for rival watercraft, aerial vehicles, and Engineers on the shores.
That new dynamic wave system also creates two distinct sailing experiences: open water and inland waterways. On the high seas around Wake Island and Tsuru Reef, roiling waves will make navigation much more difficult. Expect agitated waters to push your watercraft, which can throw off on-board weapon aiming or even create airtime, as well as create temporary cover for potential ambushes and occasionally block enemy fire.
Inland waterways, meanwhile, are calmer and more predictable. Although it is easier to pilot a boat through rivers and around lakes, these bodies of water also put your squad in dangerous territory near land. This is especially because beaching a vehicle - or putting it on land - renders it useless. Unless you prefer to turn your boat into a turret, it’s wise to keep your craft towards the center of narrow waterways and away from beachfaces.
Outside of these navigational basics, you should know both naval vehicles - the RCB-90 Patrol Boat and 7.7M NSW RHIB - have their own distinct strengths and weaknesses.

To our Battlefield 4 veterans, welcome back aboard the RCB-90.
This two-seater patrol boat is a bulkier, fully-loaded vessel built for wresting control of the Battlefield by sea. In exchange for having reduced mobility, especially when making turns, the RCB-90 boasts a larger health pool compared to the 7.7M NSW RHIB and includes multiple on-board weapon systems.
It also serves as a deploy point: when near the shore or a dock, the boat will open the front ramp automatically. This allows anyone on the team to spawn at the ramp as infantry, great for beachhead landings or making landfall for objectives near ports.
Captains of this ship have access to an autocannon - or a rotary heavy machine gun (HMG) - and missiles. The ballistic cannon primary weapon choice is better suited for close-range sea battles or peppering targets on the shore, while the HMG is more effective against infantry and aircraft. The secondary missiles are critical engagement starters that are particularly effective against fellow navalcraft. Get into the habit of firing missiles first, then following up with the autocannon or hMG when in an ideal close range, so that the Patrol Boat saves its ammo and remains off the radar until it’s tactically positioned for success.
As for the gunner, the primary objective is to launch the Patrol Boat’s 120mm mortal shells, adjusting aim frequently according to - or against - the driver’s navigation. There are two different modes for firing mortars: manual aiming, which is similar to a tank turret, is great for close range threats, while stabilized indirect fire allows for targeting points on the map even without a direct line of sight. Advanced players can also change the mortar’s muzzle velocity to adjust range and time of flight to the target.
Mortar shells come in a variety of flavors; for a quick breakdown, here’s a quick list of what mortars can be equipped and how to best use them:
HIGH EXPLOSIVE: High-damage explosive that explodes on impact, similar to the Support Gadget Portable Mortar shell. Meant for direct, accurate fire.
AIRBURST: Explodes in proximity to enemy vehicles or hitting surfaces. Deals less damage over a wider radius compared to High Explosive.
GUIDED: Lock-on mortars against land and sea vehicles. Perfect for ensuring targeted attacks, albeit with the chance to miss if defensive measures (such as IR Smoke) are deployed.
SMOKE: Creates a large smoke cloud upon impact. Excellent strategic tool for concealing movements, including for allies advancing on the shorelines.
ILLUMINATION: Parachutes down at the apex and pings enemies - both infantry and vehicles - on the minimap during its descent. Aim high and near areas where enemies may be hiding or moving towards.
The Patrol Boat’s customization options also extend to the driver weapons, which include swapping lock-on missiles for free-fire missiles and autocannon caliber changes, as well as with the boat’s equipment. By default, the Patrol Boat comes with IR Smoke to break incoming lock-on fire, as well as an additional equipment slot for torpedoes or mines, which are fired off the stern (or back of the boat, for non-seaworthy soldiers).
Torpedoes cause devastating wire-guided impact on enemy watercraft, while mines act as a means to ruin sailing expeditions for unsuspecting captains. The choice is yours for this alternative explosive; do you decide for an additional active threat? Or take the patient approach and strategically trap enemies into disadvantageous positions?

The 7.7M NSW RHIB, first introduced in REDSEC, may not have as much customization, but its design is perfect for swiftly navigating across water with the full squad. As a smaller vessel, it can be better concealed by rolling waves and cuts through small bodies of water with greater ease.
However, note its low health and its lack of cover for any of those on board. For this vessel, speed kills: Go too slow and enemies will surely cause a wipeout, while making those quick movements could lead to nimble aggressive plays.
Its lone on-board weapon is a machine gun capable of putting holes into light vehicles or enemy groups. Most likely, a RHIB’s passengers will provide the firepower with their own weapons, but whoever can operate this machine gun can lay down strong suppressive fire in a pinch.

RIDE THE WAVES. Expect open waters to toss boats around thanks to dynamic waves; use them as cover to conceal movements or block incoming fire.
MIND THE MOTION OF THE OCEAN. Adjust your aim according to how the water moves underneath your vessel. It may take practice, but predicting ebbs and flows is key to accurate fire!
STALLING IS SURRENDERING. Boats take time to move again after stopping. Keep your navalcraft moving; even small circles help you avoid a slow restart and enemy attacks.
CUSTOMIZE AND PULVERIZE. With multiple mortar options and available torpedoes, levelling up the RCB-90 Patrol Boat allows you to become a versatile threat, both directly against infantry, land, sea, and air vehicles, as well as indirectly through smoke and intel gathering tools.
RHIB FOR RAPID MOVEMENTS. The smaller 7.7M NSW RHIB is built to quickly maneuver through waterways: use it to chart a course for a deadly flank around landlocked enemies.
For more information about Battlefield, bookmark our website, subscribe to our newsletter, and stay connected with our Community across all our social platforms @Battlefield, including on Discord.
This article may change as we listen to community feedback and continue developing and evolving our Live Service & Content. We will always strive to keep our community as informed as possible.